
Table of Contents
To create a user-friendly and professional website in WordPress, a search bar is one of the easiest and most effective features to use.
When visitors come to your site, they want to find the information they are seeking with ease. If they don’t find any way to search, the chances are greater that they’ll leave.
By default, WordPress has also provided a search widget you can place into the sidebar or footer of your website, but if you place a search bar directly into the top navigation menu, it is more convenient for visitors. It is simple, tidy, and gets visitors to their content quicker. So, it is the essential feature that makes your website user-friendly.
In this step-by-step guide, you will learn how to add a search bar in the WordPress menu through theme customization and plugins.
Why Add a Search Bar in WordPress?
Adding a search bar in WordPress improves both navigation and user experience on your website. There are several benefits to including this feature:
- It enhances usability by making navigation effortless.
- It helps reduce bounce rates by offering direct access to content.
- It gives your website a professional, modern appearance.
- It’s an essential part of WordPress theme customization for user engagement.
Easy Methods to Add a Search Bar in WordPress Menu
You can add a search bar to the WordPress menu in two ways. The first method is to use your theme’s built-in features; the second method will need WordPress plugins. Both methods are simple and require no technical background.
Method 1: Using Your WordPress Theme
Many WordPress themes allow you to add a search bar in WordPress straight into your header or menu area. For example, Zakra, Astra, Kadence, and Blocksy have options built right into your theme to enable a search icon in the header section.

If you like a clean backend without adding another plugin for searches, complete the following:
Step 1: Access the Theme Customizer
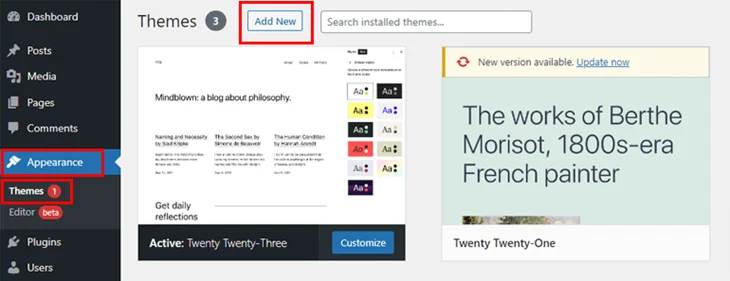
Start by logging into your WordPress dashboard. From the sidebar, go to Appearance > Themes, then click the Add New button.
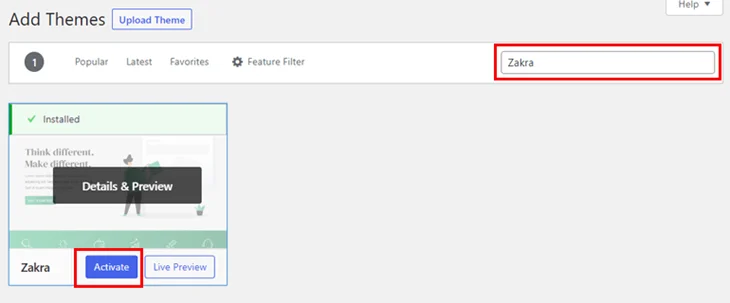
Now, search bar type Zakra, and once this appears in the search result, then click the install and activate buttons.
This is where you will find all of the WordPress theme customization options, including header design, menu design, and anything else, including a search icon.
Usually, depending on your theme, you will want to look for a tab called ‘Header,’ ‘Menu,’ or ‘Header Builder.’ Most themes will have you look for a toggle that says ‘Enable Search Icon’ or ‘Add Search to Menu.’
Step 2: Enable the Search Option
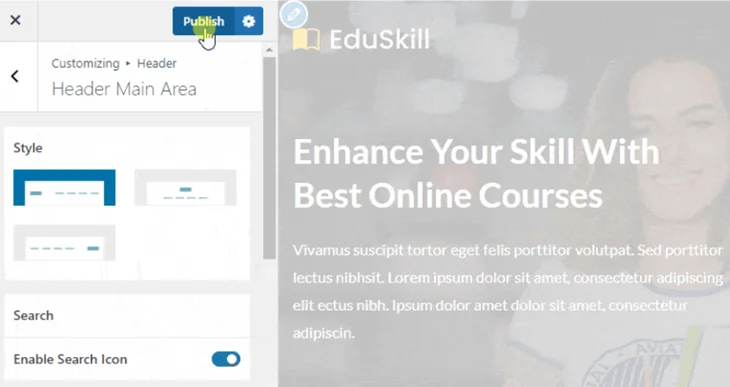
In Zakra, for example, go to Appearance > Customize.
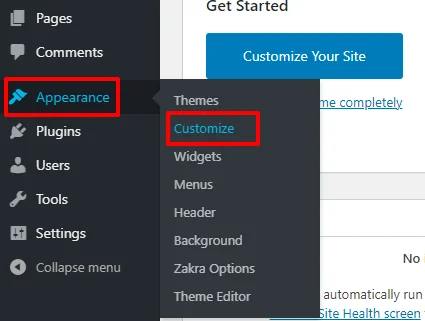
Then navigate Header > Header Main Area.

Switch the Enable Search Icon toggle to “Enable,” and don’t forget to click the publish button.
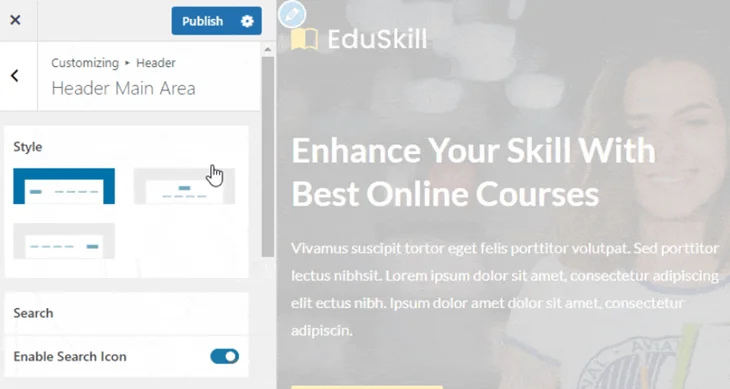
You’ll immediately see a magnifying glass icon appear in the preview of your site header. This represents the search bar in the WordPress menu.
Typically, you can place the icon on the right side of your navigation menu. However, depending on your theme, you might have one or more options to put it in a different location or even use a full search box.
Step 3: Customize the Search Bar Layout
After you activate the feature, you will want to customize the design. When you enter the Customizer, you can adjust its alignment, icon size, and also select whether it opens as a dropdown or a pop-up.
A few themes allow even greater WordPress theme customizations, such as background colors or animation effects when the search field opens. Pick the layout that best matches your site design and user flow.
Step 4: Publish and Verify
Press the Publish button to commit your changes.
Next, view your site and test out WordPress Search by inserting a keyword and verifying it returns the correct results for users.

If your theme doesn’t have that capability or you want more directional control over design and functionality, you will have to use a plugin, as outlined in the next section.
Method 2: Using a WordPress Plugin

In instances where your theme does not have a built-in search in the header, you can use almost any WordPress plugin to introduce the search functionality. Ivory Search is one of the best tools around. It is easy to get started with, lightweight, and it works with all the current major themes.
Step 1: Install and Activate Ivory Search
Go to Plugins > Add New Plugin on your dashboard.
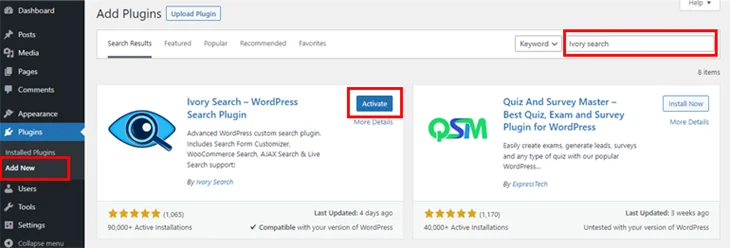
Type “Ivory Search” into the search field. When it appears, click Install Now and then Activate. Once your plugin is activated, you will have a tab called “Ivory Search” in your administrator menu.
The plugin allows you to create custom search forms and place them anywhere on your site, even in the navigation menu.
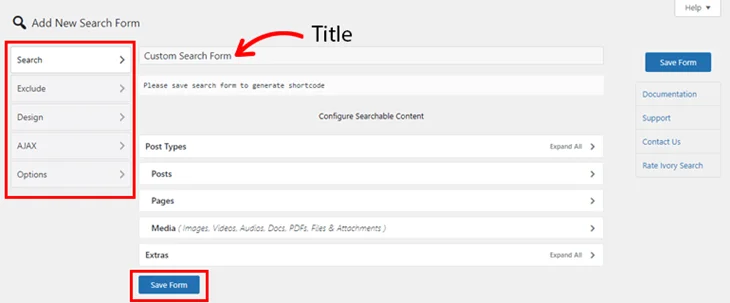
Step 2: Create a Custom Search Form
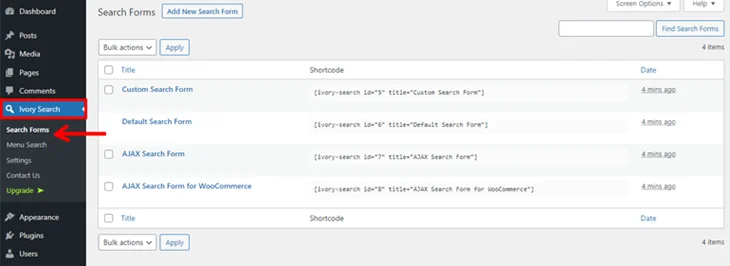
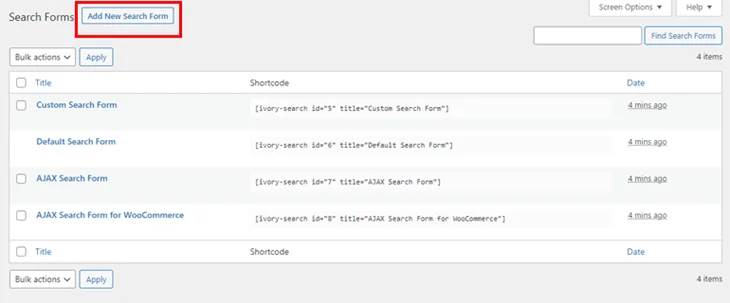
Navigate to Ivory Search > Search Forms > Add New.
Give your new form a name, like “Main Menu Search.”
Next, define what your WordPress search bar should include. You can allow users to search all content or limit it to specific post types such as blog posts, pages, or WooCommerce products.
You can also exclude certain content categories or tags to keep search results clean. To enhance functionality, enable AJAX Search, which displays live results as users type, without reloading the page.
Click Save Form once your settings are complete.
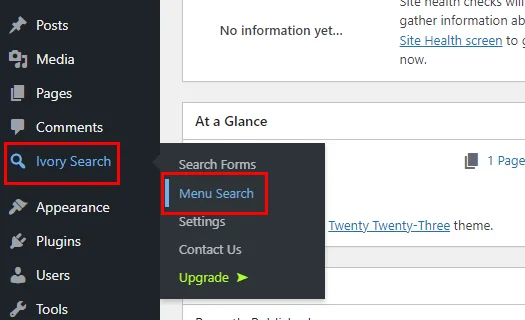
Step 3: Add the Form to Your Navigation Menu
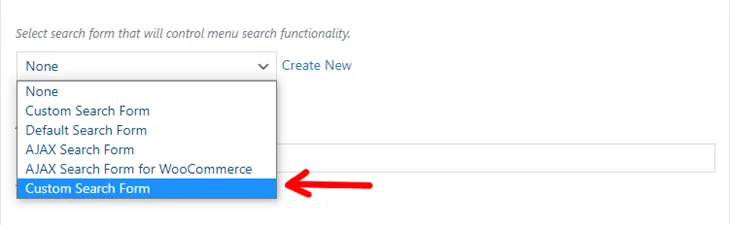
To display the newly created form, go to Ivory Search > Menu Search.
Select your preferred menu, usually “Primary Menu.” From the dropdown, choose the form you just created. You can decide whether the search bar in WordPress appears as an icon or as a visible search box on the navigation menu.
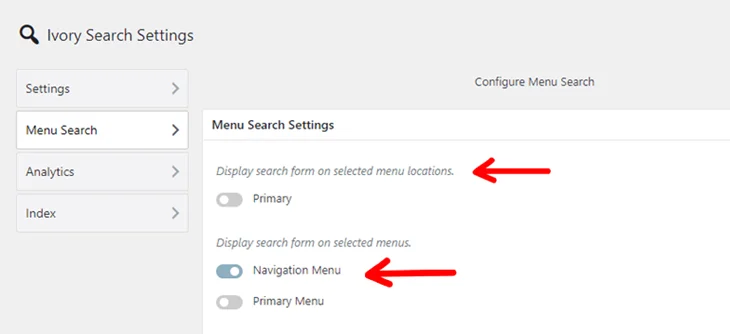
After selecting your preference, click Save Changes.
Step 4: Adjust the Appearance
Ivory Search offers options to match your search bar with your theme. You can change icon colors, alignment, and size to ensure it blends with your header design.
If you would like the full search box instead of a small icon, you can change the layout directly from the plugin’s settings.
Step 5: Test on Desktop and Mobile
Lastly, check your site on both desktop and mobile. Make sure the search bar in the header of WordPress displays appropriately and functions correctly.
Ensure it’s not overlapping any other items in the menu, and that it is showing instant search results if AJAX is enabled. Testing helps confirm that your add search bar to WordPress menu setup works perfectly across devices.
Benefits of Adding a Search Bar in WordPress Menu
Implementing a search bar in your WordPress menu provides valuable benefits. It enables visitors to locate what they want quickly and makes your overall website seem more organized and professional.
In relation to blogs, a search bar helps readers navigate a topic much more easily, which is an overall benefit.
If your website is an eCommerce store, introducing a search bar simplifies the product discovery process and may enhance conversions when customers can find their product quickly.
Overall, incorporating this feature will greatly improve user satisfaction, the overall goal of your website, and the navigation experience of your visitors.
Wrapping It Up
Implementing a search bar in WordPress is one of the most beneficial upgrades you can make to your site. You can go about doing this through your theme’s customization options, or you can utilize the built-in WordPress plugins like Ivory Search.
In a matter of minutes, you can add a search bar in the header of WordPress and improve the functionality of your site. It is a small change, but it dramatically impacts the way a user experiences your content.
You May Also Like: