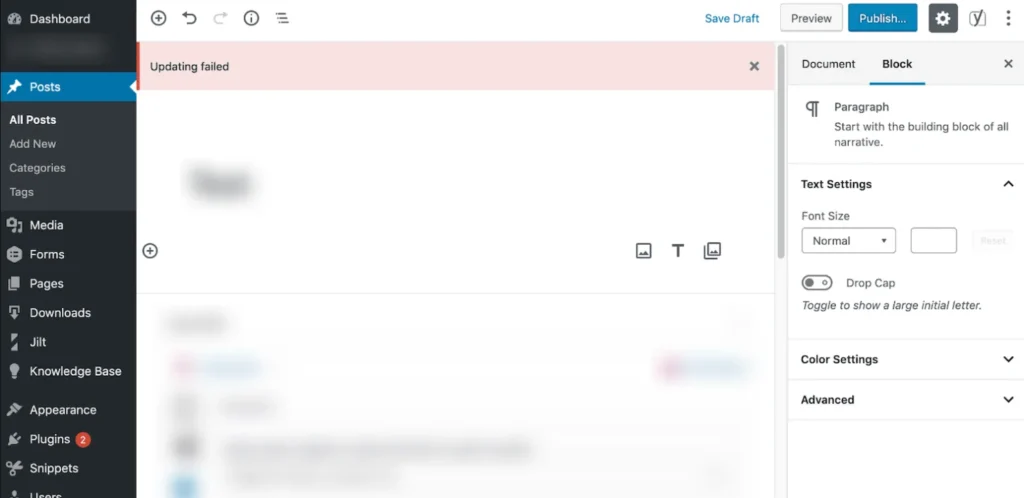
If you are a WordPress user, you must have encountered the “WordPress update failed” error at some point. Whether you’re trying to update a post, theme, plugin, or WordPress itself, this error can show up in multiple ways, like:
- “wp update failed”
- “WordPress post updating failed error”
- “WordPress update failed: could not create directory”
- “WordPress update failed: download failed. unauthorized”
- “WordPress updating failed: the response is not a valid JSON response”
The “WordPress Updating Failed” error usually pops up when WordPress can’t complete the update process. Figuring out the exact reason is key to finding the right fix.
So, before learning to fix this type of issue, let’s know why and when you saw this error.
Why Does the WordPress Updating Failed Error Happen?

- Permission Issues: Your site doesn’t have the right file permissions to update.
- Server Timeouts or Network Issues: A weak connection, bad gateway errors, or an overloaded server can cause failures.
- JSON Response Issues: If WordPress can’t communicate properly with the server, you’ll get a “response is not a valid JSON response” error.
- Corrupt Plugins or Themes: A broken plugin or theme can prevent WordPress from updating properly.
- Plugin or Theme Conflicts: Some plugins or themes may not be compatible with the new update, leading to failure.
- Insufficient PHP Memory Limit: WordPress updates require enough memory to process. If the limit is too low, the update can crash.
- Outdated WordPress or Components: Running an old version of WordPress, PHP, or a database can cause update failures.
- DNS or Firewall Restrictions: If your host or security plugin is blocking updates, you might see errors like “WordPress update failed: download failed. curl error”.
Now, let’s get to how to fix it.
Step-by-step Guide To Fix WordPress Updating Failed Error
Step 1: Check Your Internet Connection & Site URL
Sometimes, the simplest fix is the right one. If your internet connection drops while updating, you might see errors like:
- “WordPress update failed: you are probably offline”
- “WordPress updating failed. The response is not a valid JSON response.”
How to Fix It:
Refresh and Try Again: Make sure your internet is stable, then reload your WordPress dashboard.
Check Your WordPress Site URL: If the Site URL and Home URL are incorrect, updates can fail.
- Go to Settings > General in your WordPress dashboard.
- Make sure both the WordPress Address (URL) and Site Address (URL) are correct.
- If your site uses HTTPS but your WordPress settings still have HTTP, update it to HTTPS and save the changes.
Step 2: Fix File Permission Issues
Incorrect file permissions can block WordPress from updating files. You may see errors like:
- “WordPress update failed: could not create directory”
- “WordPress update failed: could not remove the old plugin”
How to Fix It:
You’ll need access to FTP or your hosting file manager to fix this.
- Log into your hosting control panel (or use an FTP client like FileZilla).
- Go to the WordPress root folder (public_html).
- Right-click the “wp-content” folder > Select “File Permissions” (or “Change Permissions”).
- Set file permissions to all: Folders:
755and Files:644 - Apply changes and retry the update.
If you’re using cPanel, you can adjust permissions in the File Manager under “Settings”.
Step 3: Manually Update WordPress Core, Plugins, or Themes
If updates are stuck, you can manually update them. This is useful when you see errors like:
- “WordPress update failed: the package could not be installed”
- “WordPress update failed: download failed. unauthorized”
How to Fix It:
Manually Update WordPress Core:
- Go to the official WordPress download page and download the latest stable version of WordPress.
- After downloading, extract the WordPress files on your computer.
- Using an FTP client, connect to your site and upload the new files. (Note: Never update the wp-content folder and the
wp-config.phpfile. It is overwriting your content and settings.) - After uploading the files, go to
http://yourwebsite.com/wp-admin/upgrade.phpto run the upgrade script and complete the manual update.
Manually Update Plugins or Themes:
- Download the plugin/theme from the developer’s site or the wordpress plugin store.
- Delete the old version from your WordPress dashboard.
- Install the new version manually under Plugins > Add New or Themes > Add New.
Step 4: Increase Server Limits
Low server memory limits or DNS issues can cause update errors like:
- “WordPress update failed: internal server error”
- “WordPress update failed: download failed. curl error 77”
- “WordPress update failed: download failed. curl error 6: getaddrinfo() thread failed to start”
- “Fatal error: Allowed memory size of X bytes exhausted.”
How to Fix It:
Increase PHP Memory Limit:
- Open your wp-config.php file (located in public_html).
- Add this line at the bottom before
/* That’s all, stop editing! */:
define('WP_MEMORY_LIMIT', '256M');
- This will increase the PHP memory limit to 256MB, which should be sufficient for most WordPress sites.
Increase Execution Time:
- Edit your
.htaccessfile and add this code:
<IfModule mod_php5.c>
php_value max_execution_time 300
</IfModule>
Flush Your DNS Cache:
Windows: Open Command Prompt and type: ipconfig /flushdns
Mac: Open Terminal and type: sudo killall -HUP mDNSResponder
Step 5: Clear Your Cache and Disable CDN/Security Plugins
If updates keep failing, your firewall or security plugins might be blocking WordPress. This is useful when you see this error:
- “WordPress plugin update failed bad gateway error message”
Clear Cache: If you’re using a caching plugin like WP Rocket, W3 Total Cache, or Cloudflare, clear your cache or disable it for sometime.
Disable Security Plugins: Temporarily disable security plugins like Wordfence, Sucuri, or iThemes Security and try updating again.
Quick Overview Of WordPress Update Failed Errors:
| Error Type | Cause of Error | Solution |
wordpress update failed: could not create directory | Typically, a file/folder permission issue or insufficient disk space prevents WordPress from creating the necessary directory. | Verify and adjust file permissions (often 755/775 for directories) and ensure there is enough disk space. |
wordpress update failed: download failed. unauthorized | Often caused by authentication problems or access restrictions (firewall, incorrect credentials, or server configuration issues) that block the download. | Check credentials and server firewall settings; consider manually updating if automatic updating fails. |
wordpress update failed: could not create the upgrade-temp-backup directory | A permissions issue on the file system stops WordPress from creating a temporary backup directory during an update. | Adjust file and folder permissions for the wp-content directory to allow directory creation. |
wordpress update failed: could not remove the old plugin | The server’s file permissions prevent WordPress from deleting the existing plugin files. | Correct file permissions or manually remove the old plugin files before updating. |
wordpress update failed: you are probably offline | The update process cannot connect to the WordPress servers due to network connectivity issues. | Verify that the server has an active internet connection and review firewall or proxy settings that might block external requests. |
wordpress update failed: the package could not be installed | The update package might be corrupt, incomplete, or incompatible with the current WordPress setup. | Re-download the update package manually, verify its integrity, and ensure compatibility with your WordPress version. |
wordpress update failed: internal server error | A generic server error that can stem from misconfigured server settings, plugin conflicts, or insufficient PHP memory. | Check server error logs, increase PHP memory limits, reset the .htaccess file, or temporarily disable plugins to isolate the issue. |
wordpress update failed: download failed. curl error 77: | curl error 77 usually indicates an issue with the PHP version, SSL certificate permissions or an outdated/misconfigured certificate bundle. | Try to change the PHP version. OR update or reinstall the certificate bundle and verify that certificate file permissions are correct. |
wordpress updating failed. error message: response is not a valid json response | Often triggered by misconfigured server settings, a problematic .htaccess file, or plugin conflicts that disrupt the REST API responses. | Reset or correct the .htaccess file, temporarily disable conflicting plugins, and refresh permalinks or increase PHP memory if needed. |
wordpress plugin update failed: bad gateway error message | A bad gateway error is typically related to proxy, caching, or server configuration issues interrupting communication with update servers. | Check the proxy or caching configurations and review server settings. Also, check this detailed blog on this error. |
Note: Each error can have multiple underlying causes, so if one solution doesn’t work, reviewing server logs and testing alternative fixes is recommended.
Tips to Avoid the WordPress Updating Failed Error
That’s why I have shared some very simple tips here, which are even easier to follow than driving a car. So, please try to follow them with full dedication.
1. Always Back Up Your Website:
Before updating anything, create a full backup. Use plugins like UpdraftPlus or BackupBuddy to back up your files and database. This way, if something goes wrong, you can restore your site instantly.
2. Keep Your Hosting Environment Updated:
Ensure your hosting provider supports PHP 7.4 or later, the latest version of MySQL or MariaDB versions and has sufficient server resources to handle updates.
3. Deactivate Plugins Before Major Updates:
Some plugins interfere with WordPress updates. So, before updating WordPress core, disable plugins, update WordPress, and then reactivate them one by one.
4. Choose a Reliable Hosting Provider:
Many update errors happen due to slow servers. If you frequently see timeout issues, consider moving to a powerful managed WordPress hosting provider.
Final Thoughts
Fixing the “WordPress Updating Failed” error doesn’t have to be stressful. Just follow these simple steps to get your site back on track. Remember, technical hiccups are part of managing a website, but knowing how to troubleshoot them is a must for you to keep your website healthy.
If you’ve faced this error before, what solution worked best for you? Drop your fix in the comments so we can all learn from each other!
For more tips on keeping your WordPress site error-free, check out our other guides.
Struggling with Other WordPress Errors? These are some fixes:


