WordPress is the most popular content management system (CMS) in the world. It powers over 40% of websites across the globe, and it’s easy to see why.
- It’s free and open-source.
- It’s flexible, you can create from blogs to online stores.
- It’s beginner-friendly but powerful enough for pros.
- And most importantly, in your control.
But to unlock its power, you need to know how to install WordPress. So in this guide, we will walk you through each step of the process.
We’ll also show you how to add useful features, like Google Analytics, themes, and plugins, to unlock the full potential of your WordPress site.
Table of Contents
Option 1: Installing WordPress With One Click (The Easy Way)
Most modern hosting providers understand that not everyone is a developer. So they simplify complex processes with 1-click WordPress installs. Choose the most popular hosts like Bluehost, SiteGround, Hostinger, or Namecheap to use this feature; this is the fastest route.
Here are the steps to follow:
1. Buy a Hosting Plan and Domain Name
- Visit your hosting provider.
- Choose a plan and register a domain.
2. Log In to Your Hosting Dashboard
- After purchase, access your cPanel or custom hosting dashboard.
3. Look for “Install WordPress”
- This is often labeled WordPress Tools, Website Installer, or simply 1-Click WordPress Install.
- Click it.
4. Fill in the Site Details
- Choose your domain.
- Add site title, admin username, and password.
- Set your preferred language and install.
5. Access Your Site
- Visit www.yoursite.com/wp-admin
- Log in using the credentials you just set.
- Congratulations, WordPress is now live!
Video Guide:
Option 2: Installing WordPress Manually
Let’s say you’re using a host that doesn’t offer 1-click installs, or maybe you just want to understand the process deeply. Here’s how to do it manually.
It might sound intimidating, but follow this process and you’ll soon be the one helping others.
What You’ll Need:
- A domain name
- A hosting account (with cPanel or FTP access)
- Access to phpMyAdmin
- An FTP client (like FileZilla)
Follow this process Step-by-Step:
1. Download WordPress
- Go to wordpress.org and click “Download WordPress.” You’ll receive a .zip file.
2. Upload WordPress to Your Server
- Open FileZilla.
- Enter your FTP credentials from your host.
- Navigate to the public_html folder.
- Upload the zip file and extract it.
3. Create a Database
- Go to your hosting control panel and open phpMyAdmin.
- Click Databases > Create new database.
- Name it something simple like mywp_site.
- Then create a user, assign a password, and grant full access.
4. Configure wp-config.php
- Inside your uploaded WordPress folder, find wp-config-sample.php.
- Rename it to wp-config.php.
- Open it and fill in:
define('DB_NAME', 'mywp_site');
define('DB_USER', 'yourusername');
define('DB_PASSWORD', 'yourpassword');
define('DB_HOST', 'localhost');
- Save and close the file.
5. Run the WordPress Installer
- Open your browser and visit your domain.
- You’ll see the WordPress Installation Wizard.
- Fill in your site name, admin username, password, and email.
- Click Install WordPress.
And that’s it. WordPress is installed on your site.
Video Guide:
Option 3: Installing WordPress Locally
Installing WordPress locally is the best option if you want to develop your site offline before making it live. With a local step, you can experiment without affecting a live website. The process differs slightly based on your operating system, but the core concept is the same.
How to Install WordPress Locally on Windows Using XAMPP
- Download and install XAMPP, a free and open-source local web server solution.
- Start Apache and MySQL in the XAMPP Control Panel.
- Download WordPress from WordPress.org.
- Move the WordPress files into the “htdocs” folder of your XAMPP installation directory.
- Create a MySQL database using phpMyAdmin (accessed through http://localhost/phpmyadmin).
- Configure WordPress by editing the wp-config.php file with your database information.
- Complete the installation by visiting http://localhost/wordpress in your browser.
Video Guide:
How to Install WordPress Locally on Mac Using MAMP
- Download and install MAMP (a free, local server environment for macOS).
- Start MAMP, which will launch Apache and MySQL servers.
- Download WordPress and place it in the “htdocs” folder inside your MAMP directory.
- Create a MySQL database in phpMyAdmin (http://localhost/phpmyadmin).
- Edit the wp-config.php file to enter your database details.
- Finish the installation by accessing http://localhost/wordpress in your browser.
Video Guide:
Tips to Keep in Mind (Learned From Real Experience)
Over the years, I’ve seen people make small mistakes that caused big headaches. Here’s how you can avoid them.
1. Don’t Use “admin” as Your Username: It’s the first thing hackers try. Choose something unique.
2. Use a Strong Password: WordPress sites get brute-forced often. So, use a password manager and make it hard to guess.
3. Change Your Permalink Settings: Go to Settings > Permalinks and choose Post Name. This makes your URLs cleaner and better for SEO.
4. Install a Caching Plugin: Use free plugins like LiteSpeed Cache, WP Super Cache, or W3 Total Cache to speed up your site.
5. Use a Backup Plugin: Install UpdraftPlus or BackupBuddy right away. One day, you’ll be glad you did.
Troubleshooting Common Installation Issues
Even with the best guides, hiccups happen. Here’s how to handle them.
White Screen of Death: Likely a plugin or theme issue. Try renaming the plugin folder via FTP.
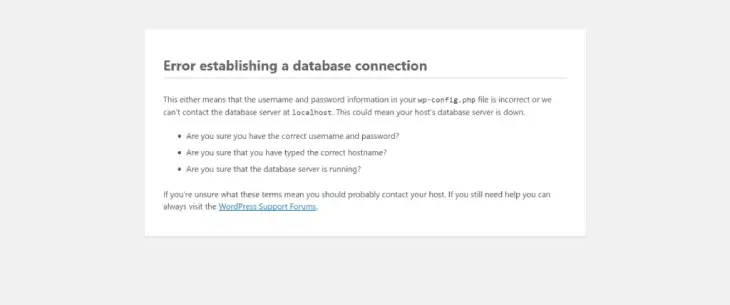
Error Establishing Database Connection: Double-check the wp-config.php file. Is the database name, user, and password correct?
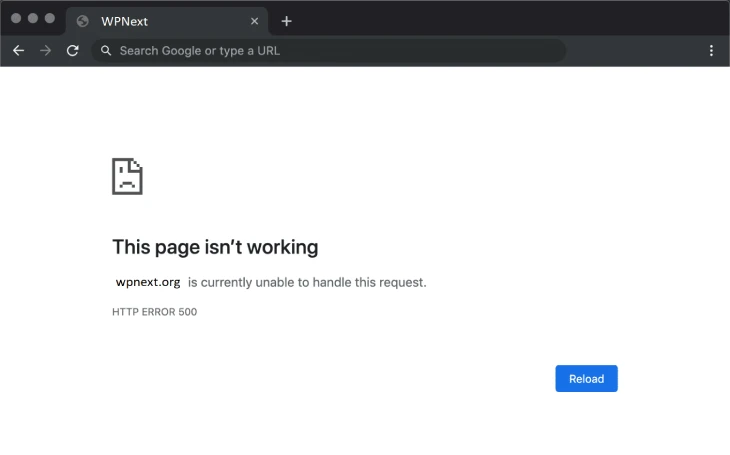
403 or 500 Error: Sometimes it’s a server permission problem. Contact hosting support, and they can resolve it fast.
Other Common Questions After Installing WordPress
How to Install a WordPress Theme?
Themes control the appearance and design of your WordPress site. Here’s how to install a theme in WordPress:
– Go to the WordPress dashboard and click on Appearance > Themes.
– Click on the “Add New” button to explore free themes from the WordPress theme repository.
– Search for a theme you like, then click “Install” and “Activate” once it’s installed.
You can also upload a premium theme:
– Download the theme ZIP file from the provider.
– Go to Appearance > Themes and click Add New > Upload Theme.
– Select the ZIP file and click “Install Now.”
– Activate the theme once the upload is complete.
How to Add Plugins to WordPress?
Plugins extend the functionality of your WordPress site. You can add plugins for various features like SEO, contact forms, security, and more.
– Go to the WordPress dashboard and click on Plugins > Add New.
– Search for a plugin in the repository, or upload a ZIP file of the plugin.
– Click Install and Activate to use the plugin.
How to Add Google Analytics to WordPress?
Google Analytics is a must-have tool for tracking your website traffic and performance. Here’s how to add Google Analytics to WordPress:
– Create a Google Analytics account and get your tracking code.
– Install the “MonsterInsights” plugin from the WordPress repository.
– Connect MonsterInsights to your Google Analytics account by following the plugin’s setup wizard.
– Alternatively, you can manually add the tracking code to your WordPress theme’s footer.
Why is Installing WordPress More Than Just Technical?
Learning to install WordPress is not just about building a website. It’s about confidence. It’s about not letting tech get in the way of your ideas. And it’s about understanding that the only thing between you and progress… is usually a few clicks.
Whether you use a 1-click route or do manual setup, you’re learning a skill that can serve you for years. It can help you launch a blog, build a business, start a portfolio, or teach someone else how to do the same.
Explore Other Most-Useful WordPress Blogs: