Table of Contents
Have you ever updated your WordPress website only to find that the changes aren’t visible on the front end? Don’t worry, this usually isn’t an issue with your theme or hosting. In most cases, caching is the reason.
Caching allows WordPress and related services to store temporary versions of your site so pages load faster for visitors. While this improves performance, it can sometimes cause your site to display outdated content. Think of it like a waiter remembering your usual order – helpful most of the time, but not ideal when you want something new.
That’s why it’s important to know how to clear your WordPress cache correctly. Clearing the cache ensures visitors always see the latest version of your site.
In this guide, you’ll learn how to clear the WordPress cache without a plugin, how hosting and CDN caching work, and what to do when updates still don’t appear.
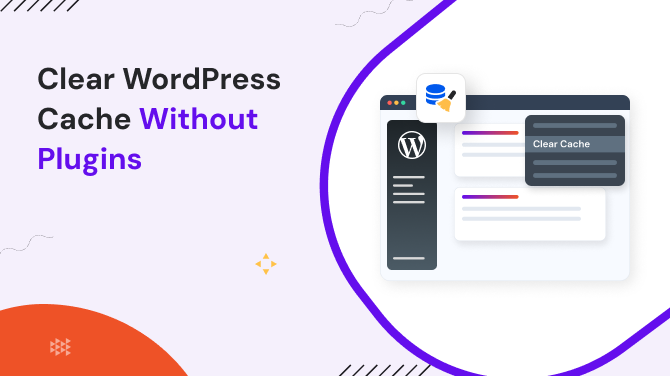
How to Clear WordPress Cache Without Plugins
Even if you’re not using a caching plugin, your site may still be cached at multiple levels. WordPress sites commonly use several layers of caching, including browser caching, hosting-level caching, and CDN caching.
Below are the steps to clear each layer.
1. Clear Browser Cache
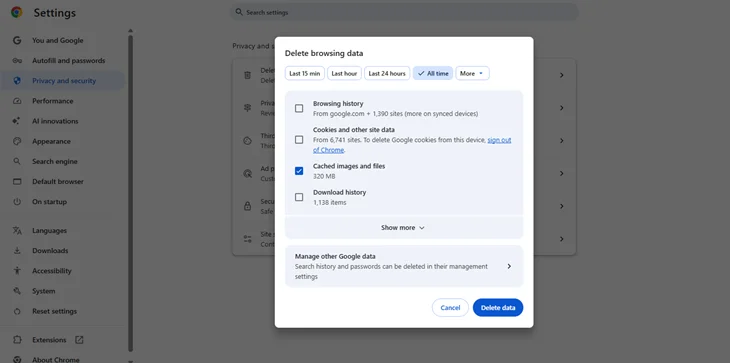
Browsers store images, scripts, and page data locally to speed up load times. Sometimes, this causes older versions of your site to appear even after updates.
On Google Chrome:
- Open the three-dot menu
- Go to Settings > Privacy and Security
- Click Clear browsing data
- Check Cached images and files
- Click Clear Data
On Safari (Mac):
- Open Safari > Preferences > Advanced
- Enable Show Develop menu in menu bar
- Go to Develop > Empty Caches
This usually resolves minor display issues during development or testing.
2. Clear Hosting-Level Cache
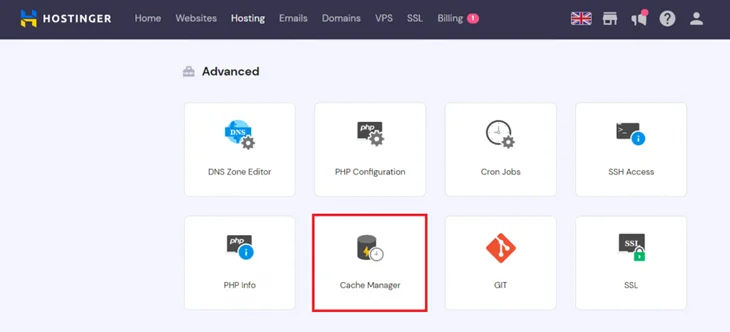
Many hosting providers use server-side caching. Clearing your browser or plugin cache may not be enough if your host is still serving cached files. To clear hosting-level cache:
- Go to your hosting control panel.
- Look for options like Cache Manager, Performance, or Optimization
- Click Flush Cache or Clear Cache
Using hosting tools is often more powerful than a cache clear WordPress plugin when diagnosing performance issues.
3. Clear CDN Cache
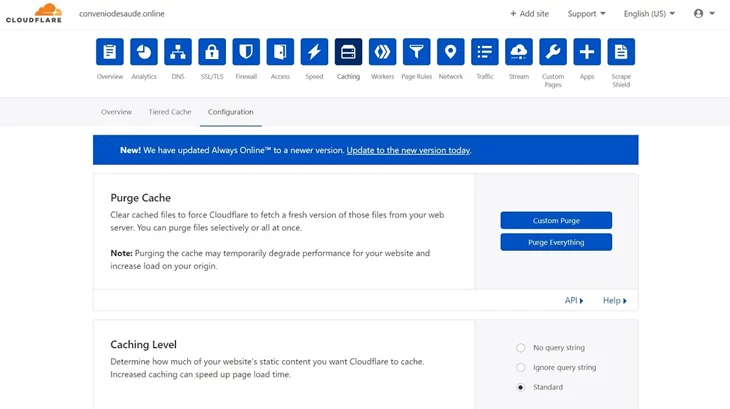
If you use a Content Delivery Network (CDN), it may still be serving cached copies of your site from global servers, even after other caches are cleared.
Most CDNs provide a cache purge option in their dashboard. Look for options such as:
- Purge Everything
- Delete Cache
- Flush CDN Files
Use this step when changes still don’t appear after clearing browser and hosting caches.
Which Cache Clearing Method Is Right?
Browser cache: Best for designers and developers testing changes. It only affects your device.
Hosting cache: Clears cached files stored on the server and improves live performance.
CDN cache: Removes cached content worldwide and is essential for sites using global delivery services.
Each layer serves a different purpose, and clearing the correct one saves time and frustration.
If the Issue Still Continues, Follow These Steps
1. Do a Hard Refresh
Sometimes, your browser may still show older files even after clearing the cache, but this is a temporary and easily resolved situation. A hard refresh makes the browser reload all resources over the server.
- On Windows: Press Ctrl + F5
- On Mac: Press Cmd + Shift + R
Be sure to do this on the front end of your site, as well as inside of the WordPress administration dashboard, to verify whether the problem is gone.
2. Clear Your DNS Cache
In case you have changed your domain settings, changed your hosting, or changed your URLs recently, you might continue to use old DNS data in your computer. The solution to this is to clear your DNS cache, which makes your device re-download new routing information.
In Windows: Open Command Prompt and give the following command > ipconfig /flushdns
On Mac: Open Terminal > type sudo dscacheutil -flushcache; sudo killall -HUP mDNSResponder
It is particularly vital when you are testing new changes following a site migration or domain update.
3. Temporarily Disable Your CDN
It could still have a set of older WordPress caches of your site even after clearing hosting and plugin caches, assuming that you are using a CDN (Cloudflare or RocketCDN).
Turn off CDN, reload your site, and check to see whether the new changes are working out fine.
4. Check for Plugin Conflicts
Certain plugins, especially optimization, caching, or security plugins, will play with the operation of your cache. To test for conflicts:
- Turn off all the plugins except the caching one.
- Determine whether the problem subsides.
- Then reactivate each of the plugins one by one and monitor when an issue recurs.
After identifying the source of the problematic plug-in, determine whether to tweak its settings or just get a more compatible plug-in.
Ensure Your Website Always Shows the Latest Version
To make your website faster, it is necessary to use caching, but it comes with the side effect of your updates not showing. Luckily, de-caching in WordPress is not a complicated task as long as you know the origin of files in the cache.
The simplest thing to do is to clear your WordPress cache. In case you continue to view outdated content, then proceed to clear the browser, hosting, and CDN-level cache. However, that, together with optimization of the websites and a bit of troubleshooting, will keep your webpage in the latest version.
If you are still facing problems, you can consult with your developer or contact your hosting company to help you.
You May Also Like: